 The Word Screen
 The Word Screen
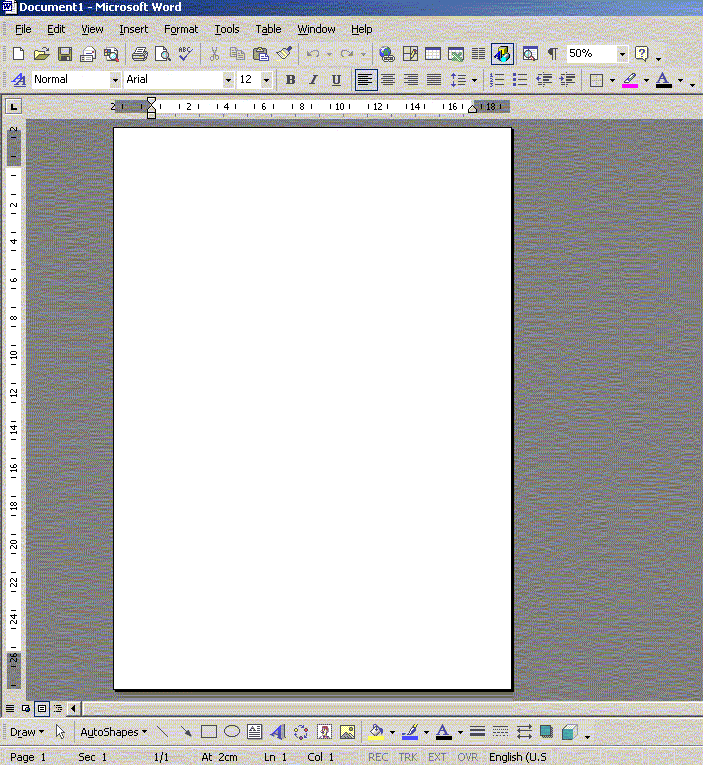
The Microsoft Word Screen looks like this:

- The Title Bar
This is at the very top f the screen. It contains the program “Microsoft Word” and sometimes the name of the document currently opened eg- “Document2”.
2. The Menu Bar
This is found directly under the title bar and contains the main menu for Microsoft Word like “File”, “Edit” starting on the left and three buttons on the right. These are: the minimise, restore & close buttons.
To access the menu you click on the menu bar and a dropdown menu will appear. Select the desired function by highlighting and clicking.
- The Toolbars
These are rows of icons that help you perform special tasks. The toolbars are accessed by the mouse. An explanation of the icons can be found after this section.
- The TAB Bar
This is found under the toolbar. It is a series of numbers measured across the screen. It helps you line up sections of text easily.
- The Editing Area
This is where the document is typed.
- The Scroll Bars
These are found at the bottom of the editing area and to the right. You can move the viewing area around by using the mouse to scroll the information up/down and across the screen. By using these your do not change the position of the editing cursor.
- The Status Bar
This line is at the bottom of the screen. It provides useful information like page number, line, column.
- Dialog Boxes
These are boxes that communicate information to the user- it may be a message, a choice being made or to inform the user of the progress of a choice. A common dialogue box appears when go go to Print.